Thursday, October 4, 2018

House Is Almost Done!

It's been slow-going, but the house is almost completely done!  Living room, gaming room, hallway are complete with new tile and paint, just my son's room, master bedroom and main bath need to be done.  I've been plagued by injuries during this whole project and with school back in session my big burly men have other priorities to tend to, so when I say slow going it's the truth.


I am loving how it's turned out, so much brighter than it was (the pics don't do justice).  I bought that chair from Amazon after I got rid of the broken loveseat and I have a console table that I still need to put together that will go against the wall behind the couch.  I also need to pick out some kind of artwork to go there as well.

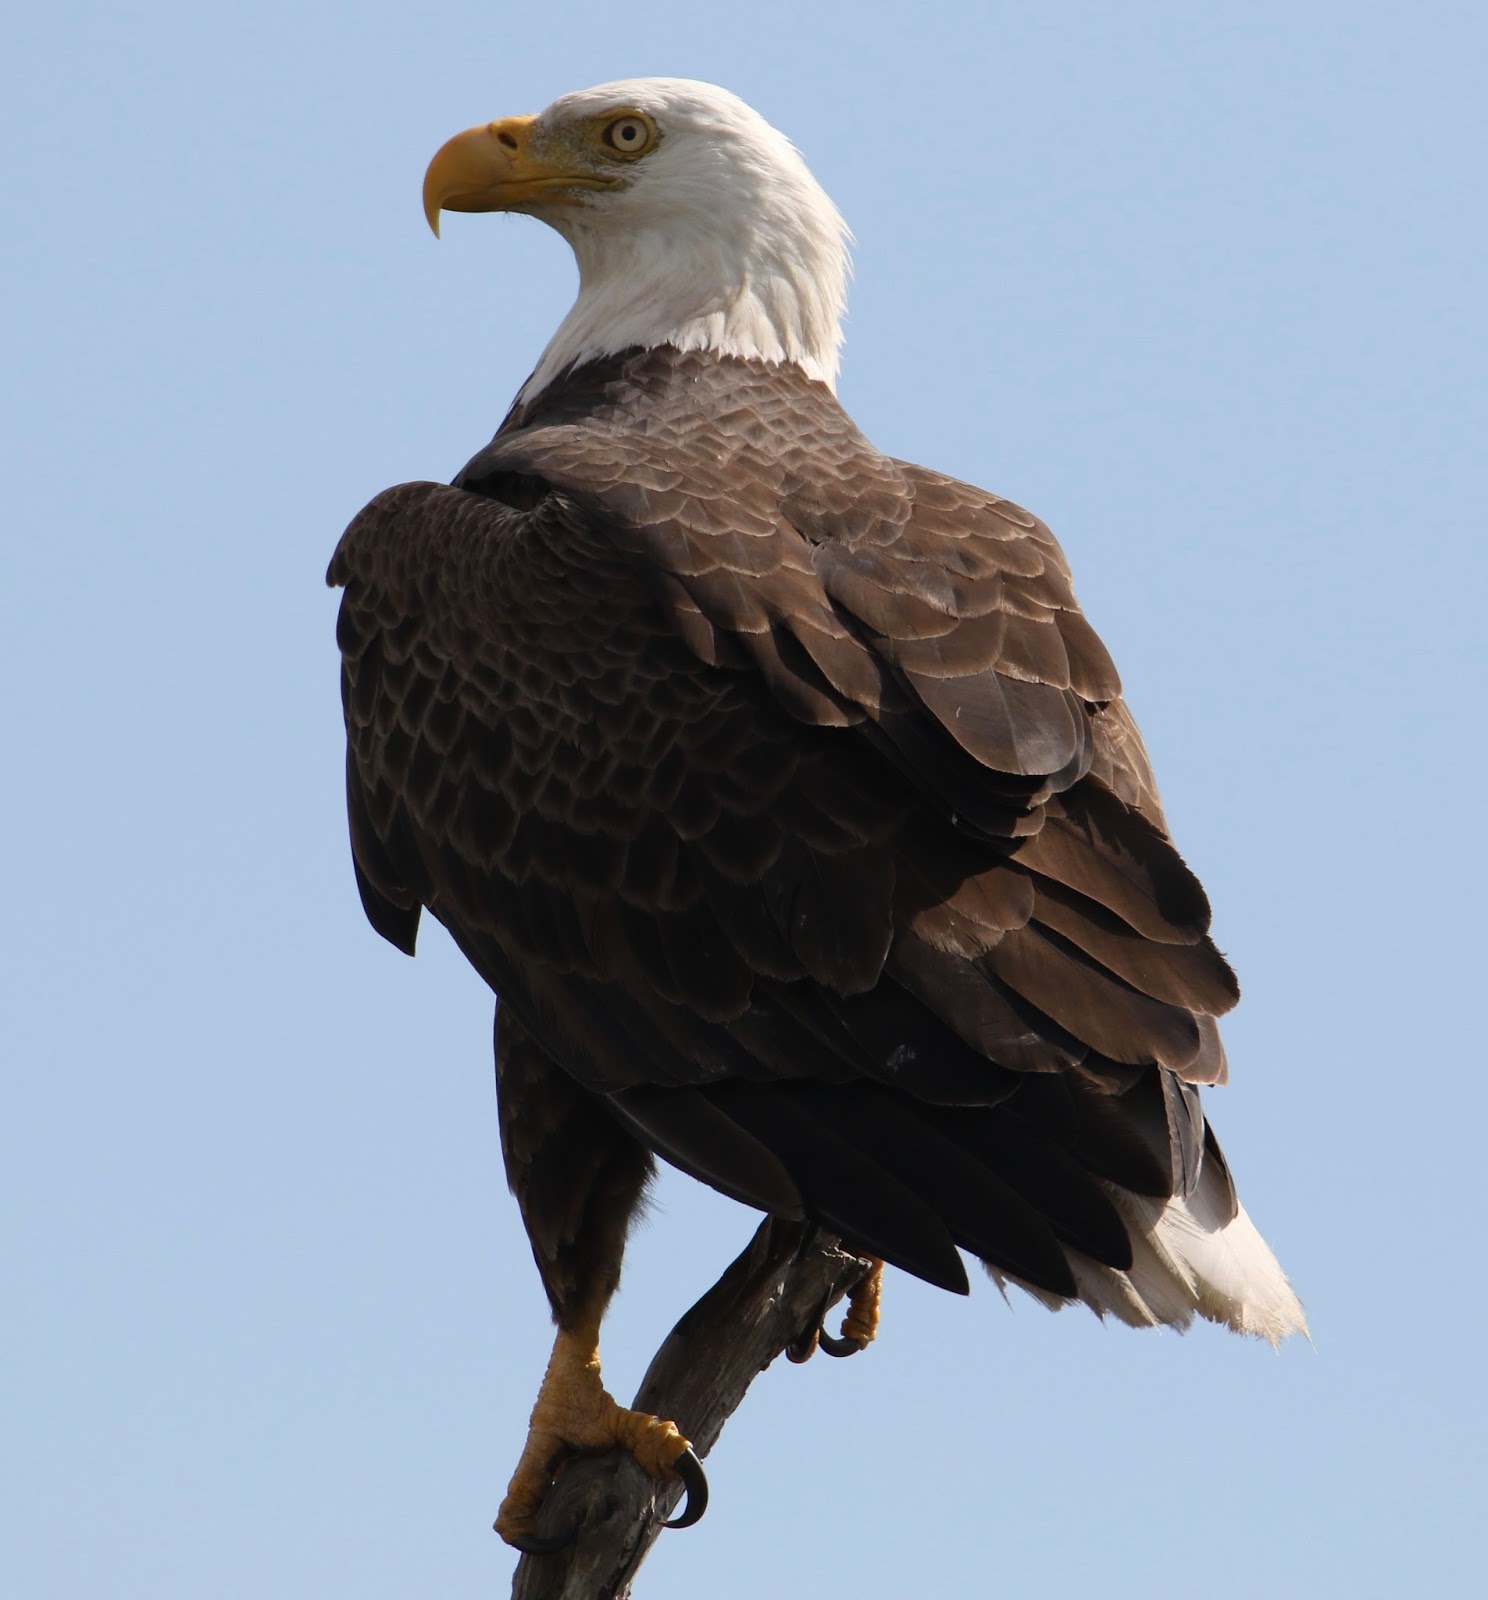
I headed out to the Viera Wetlands for the first time in a long time this week and while I didn't see many birds I did see many Raccoons and their offspring.  Here's a couple shots of what I did see.  Enjoy!


Monday, August 6, 2018

It's Been Awhile...

I haven't forgotten about y'all (or the blog!), I promise :).  Progress has been very slow though, due to injuring myself and the tile behaving badly.  I have gotten this far putting it down:


Terrazzo is a pain and I can understand why people just put carpet down over it.  I have scrubbed it, sanded it, roughed it up and still have issues with the mortar not sticking as well as it should.  For the most part I think it will be okay.  I have already determined that if a strong hurricane comes along and I get water inside again I am having someone else come to redo the tile/painting.  This is my last time!

I finally have all of the dining/living room and most of the hallway painted.  I still have to pick a color for the bedroom and the main bathroom but after those two are done painting is officially over and I can move on to the fun stuff, like decorating, which I will admit I am no good at.  I have no sense of style, plus I am a minimalist when it comes to displaying things (I hate cleaning, so the less I have to clean the better!).  I would like to have something on at least one wall and a lamp that looks a bit stylish.  Maybe a couple pillows, but that would be it.  I want it to look nice, but not bare.

Birding during the Summer here sucks, so I haven't gotten any new pics to share with you :(.  Starting around mid-September is when we start seeing an uptick in activity and that's when I start heading out.  So hang in there, bird pics will be on the way soon :).

Monday, July 2, 2018

A Decent Solution?

So I've been slowly chipping away and have the dining room floor cleared of the old stuff.  I even painted it all:


So now comes my big issue:


The bonus room that connects to my dining room has this.  The room has black tile, but my ex didn't buy enough black tile (this was many years ago) so he supplemented with the blue that we put in the rest of the house.  I have searched online and cannot find black tile like this anywhere and I think it would look awful if I just left it and started tiling with the light beige butted up against it.  Retiling the other room is not an option because of the way it was put down (don't ask), so any suggestions?

Monday, June 25, 2018

On To Phase Two/Three

Well, now that the kitchen has been completed it's time to start with the rest of the house, which means up comes the old tile...


Which will be replaced by what I put in the kitchen...


In some places it comes up very easily, in other spots though it's coming off in tiny chunks.  Part of it (the dining room in the pic above) had been replaced before, so it's really stuck and is taking quite a bit of muscle to chisel it away.  Other sections are coming up 5-6 whole tiles at a time.  The blue is throughout the house, save for the main bathroom which is only getting a repainting since everything else in it is in excellent shape.  

My plan is to tear up the floor, paint it the hallway/living/dining a nice, brighter color (it's dark green/maroon and I am tired of it) and put down the new floor.  I also have plans to paint the bedroom (it's all black.  Yes, ALL BLACK!) a much nicer, brighter shade and do some redecorating after the tile is done in there.  I don't have a timeline for getting it done, though I'd like at least the living room done in time for football season :).

Monday, June 11, 2018

Ta-Da! And a Couple Tips For The DIY Folks

Finally finished!


The stove side took longer than expected, due to needing another box of granite that had to be ordered (the box was tight and the top tile was intact, sadly the others were broken in half).  I still have some cosmetic stuff to do, but the kitchen is now fully functional and I am so happy with it!

These are the products/things I used:
  • Absolute Black Granite Tile and Rail Pieces(available online/Home Depot)
  • Fusion Pro Grout (non-sanded, no sealing needed, charcoal, Home Depot)
  • Brushed Nickel Handles (Home Depot)
  • 30" Range Hood w/Fan and LED Lights (Home Depot)
  • Traffic Master 16x16 Desert Sand Floor Tile (Home Depot)
  • Dakota White DIY Cabinets (RTAStore.com)
  • Kohler Sink and Faucet (Build.com)
  • Skil Wet Saw (Amazon.com)
  • Lot's of Friends/Pizza/Beer ;).
Some things I learned along the way (and more pics):
  • Make sure that if you are doing cabinets yourself you check every piece in every box, including the hardware.  A couple of the shelves were chipped and a few screws were missing from some of the boxes.  These weren't deal-breakers for me, but for some it might be.
  • Some pieces might not fit exactly right after you put them together.  Some of my drawers are not evenly spaced, even though they are level and put together correctly.  It's the way they were cut at the factory (and something you can't exactly predict when inspecting the boxes) and just something to be aware of.
  • Measure a bazillion times.  Then one more time for good measure before cutting.
  • A wet saw is a must for granite tile.  Rent or buy one if you plan on using this type of material for your counters.  It's also great for other tile and since I have my whole house to do it was a good purchase.
  • Take your time and don't rush when doing countertops.  If you plan on using the no-sealing grout, it takes longer to fully dry than regular grout and it is a pain to work with because it's already pre-mixed.  Follow the instructions fully and when it's time to remove the haze the grout leaves, use a small scrubby (plastic only and not ones that are on sponges!) and some elbow grease.  
Final tally for the remodel is $8,452.  I came in under budget, even with a few hiccups along the way.  I would absolutely do it again.  I learned a lot along the way and it has given me confidence to update other areas of my home.  I do hope you'll check back every so often, as I am not totally abandoning this blog now that the job is done but I won't be updating as often.  If you have any questions about how I did things or need some guidance click on my profile for my email and I'll help out as best I can.  

The last pics:

The scrubby I used (and the frog it lives in):


What I meant by the drawers not being even (first are too close together, other is just right):


A better pic of the tile and the specs in it (the pic makes the grout look lighter than it is.  I assure you it is dark):


Lot's of cabinet space (for snacks, of course)


And for pots/pans:


Tuesday, May 22, 2018

Heading Towards the Finish

The rain has really put a damper on getting things done, both last week and this one, with rain to continue through the holiday weekend.  We really need it so I won't complain too much, but having no place dry to set up my wet saw makes cutting and laying tile a little difficult.  I finally got a break Sunday, so I put some down:


I'm hoping to get the rest down soon so I can put in my cabinets, tile those and be finally finished.  After that comes the real fun part of tiling the rest of the house, painting, etc.  Here's what my sink side looks like finished and in use:


I fixed the sink so it's now flat all the way around and everything is sealed/caulked.  I will have to do a little touch-up painting but I'll wait until the whole kitchen is finished to fix a couple spots where the caulk got a little messy as I'm sure it will be the same on the stove side.  

Thursday, May 10, 2018

A Bit Of An Issue

So, tile is done, but not without some problems:


Yeah, the sink being the big one.  For some reason it does not sit flat in the front while the rest of it does.  I have no idea why or how that happened, but I do know it's going to be a huge pain and require many clips to get it all down and flush with the tile.  I also had to make a run last night to get bigger clips and screws, as the ones they give you work with regular installs, not really custom ones like this.

Tiling wasn't too bad.  I used regular mud but splurged and got the no sealing required grout which was a bit of a pain to work with.  It's thick and pre-mixed, though it does settle so trying to stir it is like trying to stir chilled peanut butter.  The edges were a pain because they kept wanting to slide down, even after putting a board to rest them on and taping them down.  Overall though, I think it came out nice and not too bad for a first-time job:


I just have to fasten the sink down, caulk around it and the tile and that side will be officially done!  Then comes the rest of the floor and the other side, which shouldn't be too bad.  Budget-wise I am just shy of $7K, with the bulk of it being the cabinets and tile but the little things add up too.  I am still way under budget for what I was quoted ($14K) for a complete remodel, so by the time I am finished I expect to be under $9K for the whole thing, which isn't too bad.

Monday, April 30, 2018

A Working Sink...Sort-Of

Bottoms are in, save for a couple drawers still needing to be put together.  Also put tile from the wall to the front of the sink, put in in the plywood and played around with some of the tiles I'll be using for the countertop (Absolute Black Granite Tile):


Yesterday the backerboard went down and I put the new sink and faucet in:


It's only in temporarily to wash dishes.  My tub is where I've been washing and it's killing my back and knees, so to give myself a break I put it in.  I have to be careful, as it's not fully attached but for washing the little things like cups and small plates it'll do.  I plan on working on the tiling this week and hope to have it all done by the weekend.  Then I can finish tiling the floor, building the other cabs and wrapping up the project.  I really thought it would take much longer, but it's been going pretty smoothly.  I just jinxed it, didn't I?

The only thing I am not happy with is the grout I'm using on the floor.  For some reason it's turning out to be very splotchy and not uniform, with parts of it being light (like it should) and other parts of it dark.  I think the mud might be causing it (I used gray), so I'm going to switch to white and see if it fixes the problem.  I have read a few posts about the grout itself and folks having the same issue when using it and I hope that's not the case.  I don't want it to look like it's been stained and abused before I even finish putting it all down.

Tuesday, April 24, 2018

More Ripping and Tearing

Well, got the sink half out:

Goodbye late 70's dishwasher:

Goodbye green sink and ugly laminate:

All gone...

Even though it was all very old with parts of it falling apart, it didn't come out that easy.  Fought 'til the bitter end :).  Those white 'pipes' are from when I had the whole house repiped a few years ago due to the old pipes under the foundation leaking.  It was much cheaper to do that then to keep having plumbers come out to tear up where the laundry is located (I had to do that twice).  So now that's all out of the way, the fun begins!  Tiling, putting in the cabs, I'm excited to finally being putting in instead of tearing out...at least on the sink side.

Tomorrow the sink, faucet and drain are coming (ordered from build.com), so those will be ready to go.  I also installed a new window sill:


I thought about using the same tile as my countertops, but I thought it might be too much black so I went to Lowes and picked this up.  No cutting necessary either, it fit right in!

The other thing I am wondering about is what to do with the window area:


I chose not to get the bridge thing that goes across and matches the cabs, but I'm not sure what to put there.  Maybe a shelf?  A curtain?  What would you put there?  I could use some ideas :).

The bird pics this week: a baby Grebe, Black-necked Stilt and a mix of White and Glossy Ibis:


Tuesday, April 10, 2018

Uppers Are Done!

Woot!  My big burly men showed up and all the upper cabinets are up, along with the new hood:


The cabinets themselves went up with no problem, but the hood took some time and it was mostly due to patching and waiting for the stuff to dry.  I did end up sealing off the vent to the outside and I will just use the fan if needed, but like I said in an earlier post I don't fry things anymore so it really made no sense to keep it open.  I am so happy everything is starting to come together and I do love those cabinets!

The foil where the door used to be is there because that door was pissing me off when I was trying to work on that side of the cabinets so I took it off.  I didn't want my cat getting in there so foil was a quick fix.  It adds character ;).

The next part of the kitchen redo is putting together the bottoms, ripping out the old, patching the walls, tiling the floor, installing the cabinets, tiling the counters, installing the sink...ugh.  I still have to pick out what sink I want (double or single?  do I go with stainless or ?), get the grout for both counter and floor, pick out a faucet, etc.  They say no project is complete without visiting the home improvement store a gazillion times and I am finding this to be very true.  Thank goodness for cash back cards!

Your bird pics for this week include a pair of Crested Caracaras and a cute little Savannah Sparrow:


Wednesday, April 4, 2018

More Progress!

I haven't given an update in awhile and I apologize.  I've been busy at the shelter and sadly I fell victim to a very nasty stomach bug that hit us all pretty hard.  But there has been progress made!


The other cabinet on the sink side was assembled and is now in place, the remaining cabinets on the stove side have been removed along with the range hood and it's been painted.  Three of the cabinets are put together and ready for mounting.  I also splurged and got a nice new hood, but I am still undecided whether to have it vent outside or seal up the vent and just use the fan.  I don't really fry foods anymore (darn you cholesterol!) and what I do cook isn't messy as far as splattering/smoking goes.  I'll have to read up on the pros/cons and make a decision before I install it.

One of the biggest things I keep waffling on is backsplash or no backsplash.  I see so many homes with subway tile used on the walls and I like it, but I also see some that don't and I like that too.  I don't want to use the standard 4-inches around the bottom because I think it not only looks dated but I just don't think it would good in my kitchen, especially the stove side (I have it there now, it's just hidden).  I may just do some kind of tile behind the stove, or I might just leave it alone.  Still so many decisions.

My bird pics for you are a proud Great Blue Heron with it's catch and a pair of baby Anhingas I snapped last week.


Monday, March 12, 2018

Busy Weekend

I managed to get quite a bit done, though it doesn't look like it.  I have determined that with renovation projects, 10% of your time is actually doing the project while the other 90% is spent running to the store to get the things you need to do the project.  I think I spent more time at Home Depot than at home!  So far, the floor is finally gone, two cabinet are down, one part of a wall has been primed and painted along with the ceiling, one of the new cabinets has been put together and awaiting install and new lighting has been installed.  Here's a few pics of what's been done:


The cabinet will (hopefully!) be put up tonight.  I can put them together by myself but I can't lift them by myself (nor can I take the old ones down), so I have to wait for a friend or two who is able to help.  There's still plenty to do, especially when it comes to patching so I won't be bored anytime soon :).

Thursday, March 1, 2018

Making some progress

So, this is it, my "lovely" kitchen that's getting a makeover:


It's so 70's with that avocado sink and the range hood is also the same color.  I'll miss it.  Not.  What you didn't see is the false ceiling which I happily ripped out and all of the brick that was on the back wall, which is/was all over the kitchen.  So I've been ripping/patching and removing the floor.  The stuff you have to use to get all of it up is nasty (and comes with lot's of warnings on the can) so I've been waiting for a really good windy day when I can open all the doors/windows so we don't have to breathe any of it.  It's supposed to be much cooler and very windy this weekend so I am hoping to get it all done.

My cabinets arrived on Monday...


This is not all of them, the others are scattered about the house.  My biggest priority is getting the sink-side done first since I have to deal with plumbing, electrical and all that fun stuff.  The stove-side just involves a lot of moving and unplugging, so it shouldn't be too much of a hassle.  I hope.

I managed to go birding, so I'll leave you with these two.  Have an awesome weekend!